Manage an existing private network tunnel
For new connections to internal MCP servers, APIs, or databases, set up a Private Network. Use the instructions below to operate an existing tunnel.
Reach MCP servers running inside your VPN, VPC, or private subnet—you run a small reverse proxy that dials outbound to a Mintive-hosted tunnel endpoint, and Mintive routes requests to your internal servers through that connection.
Available on Mintive Enterprise plans.
When to use the private network tunnel
- Your MCP server runs inside a VPN, VPC, or private subnet that Mintive can't reach directly
- You don't want to open inbound firewall rules, set up VPN peering, or pin static egress IPs
- You need Mintive's authentication, policy, and audit logging to apply to those internal servers
For MCP endpoints already reachable on the public internet, use Add a remote MCP instead.
How it works
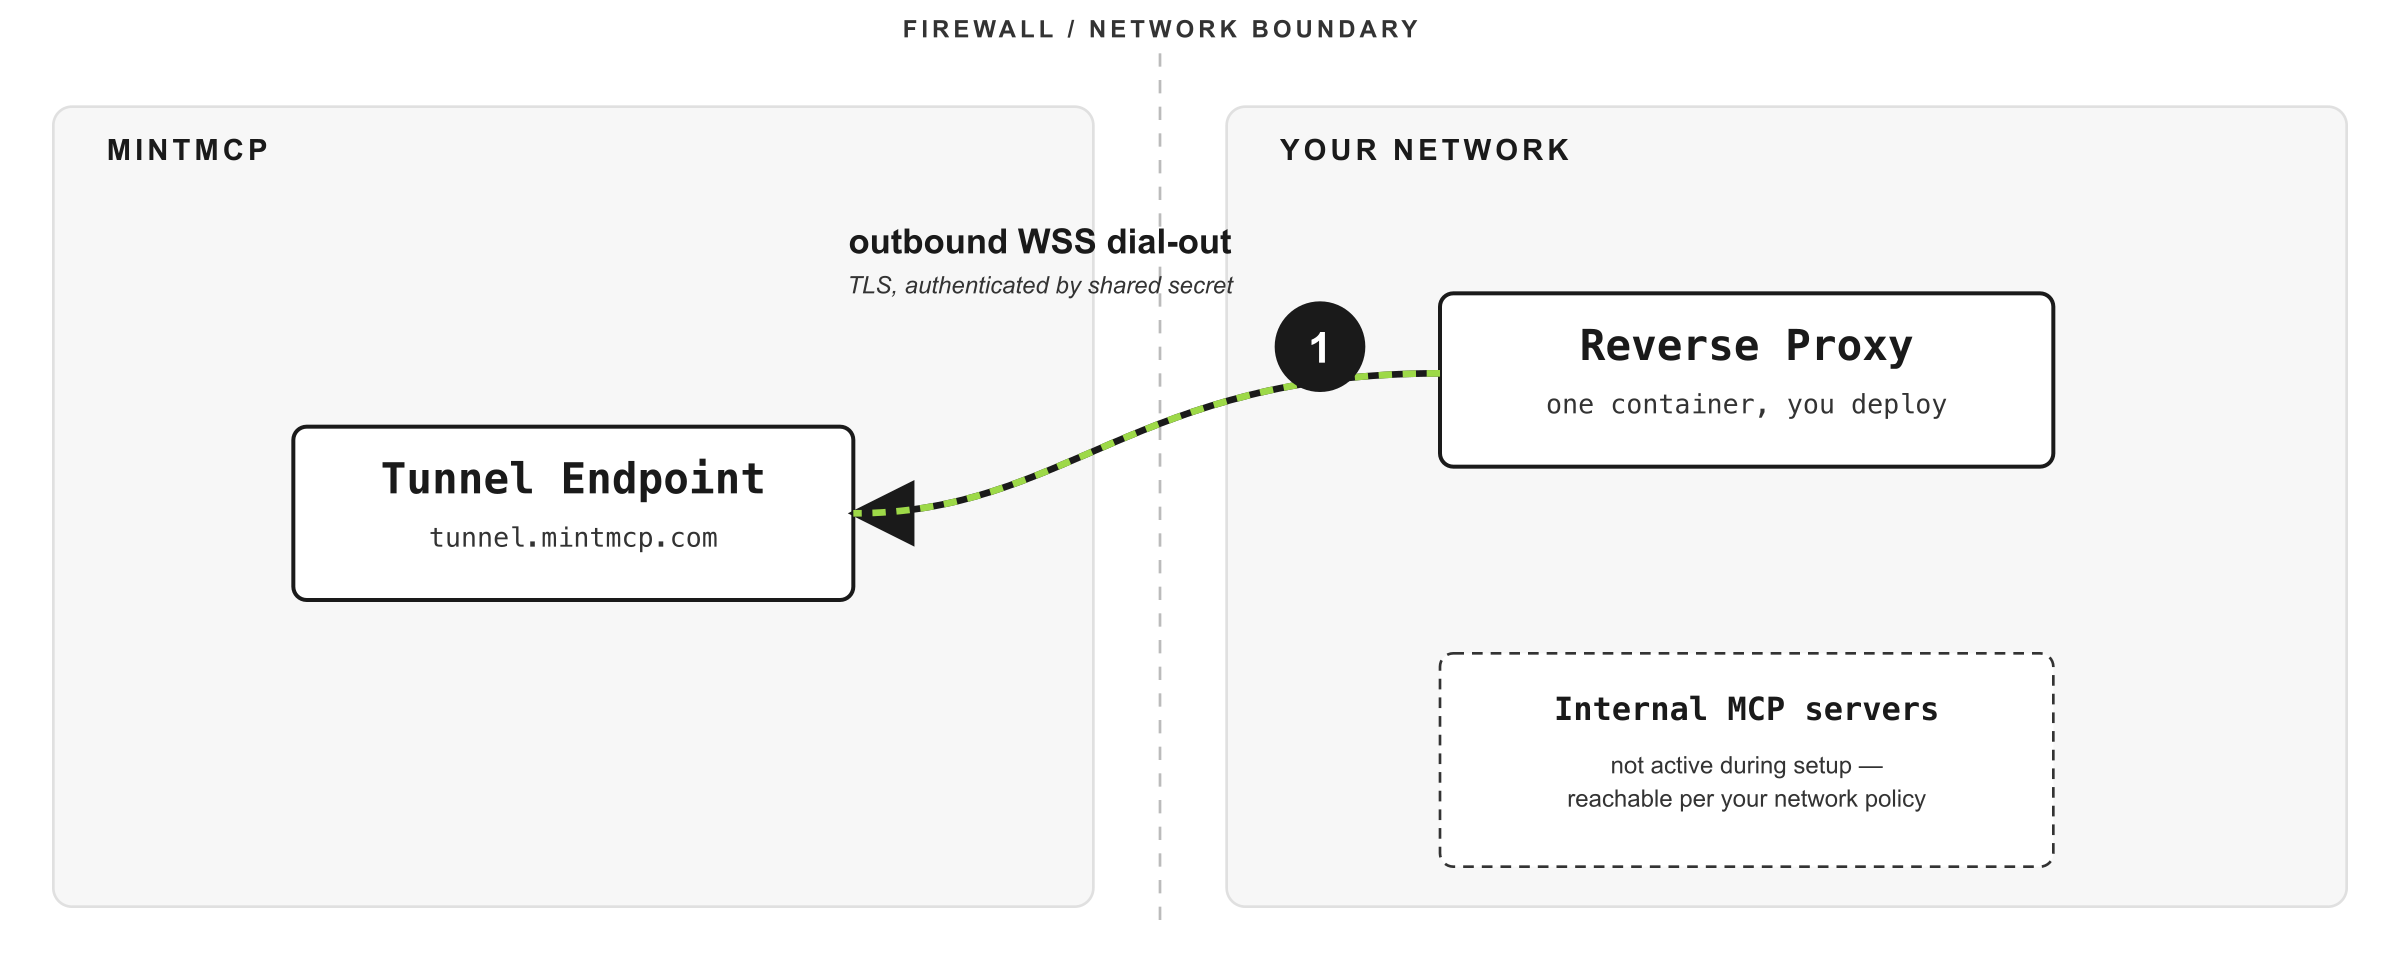
Mintive runs a tunnel endpoint outside your network, and you deploy a reverse proxy inside your network configured with the tunnel proxy URL and a shared secret. The proxy opens a persistent, TLS-encrypted WebSocket connection outbound to the endpoint and holds it there.
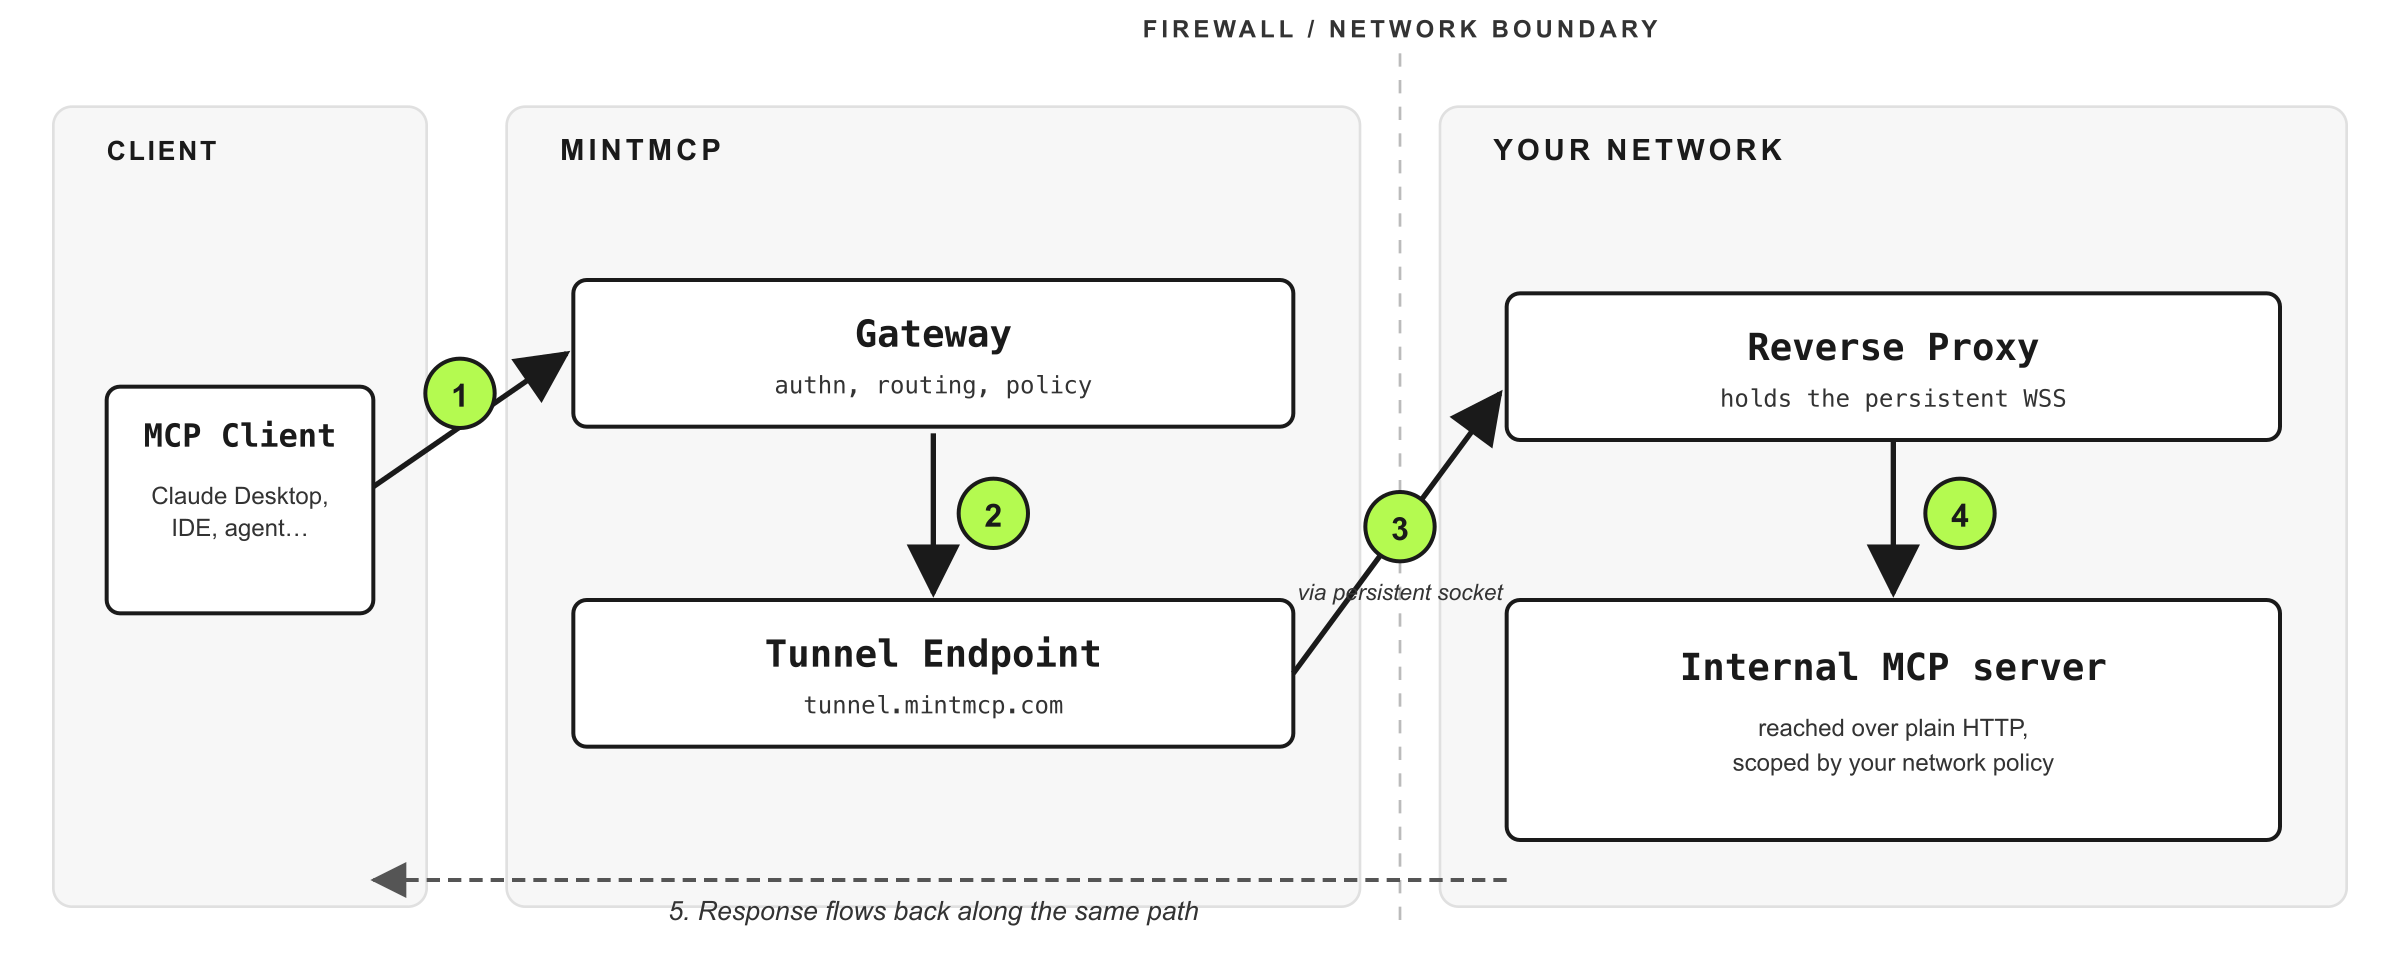
Once the tunnel is up, the runtime path for any MCP request is:
- A client sends an MCP request to Mintive from wherever it runs
- Mintive authenticates the call and applies gateway policy
- The request is forwarded down the open tunnel to your reverse proxy
- The proxy calls the internal MCP server over whatever transport your network already provides (plain HTTP on a private subnet, mTLS, service mesh)
- The response travels back along the same path to the client
What you deploy and configure
The reverse proxy ships as a single container, available as a Helm chart or an npm package. It runs as a non-root user, exposes no Service, and has no inbound ports — the only traffic it ever sends is outbound 443 to Mintive.
You configure two values:
| Setting | Description |
|---|---|
| Tunnel proxy URL | The Mintive-hosted endpoint the proxy connects to |
| Reverse proxy shared secret | A per-tunnel secret the proxy presents on connect |
You don't configure a list of upstream URLs in Mintive. Your network policy decides which internal hosts the reverse proxy can reach, so the trust boundary stays where your security team already manages it.
The tunnel's page in Mintive shows live status for connected reverse proxies, including the last disconnect close code and reason, so when a tunnel drops you can see why without pulling proxy logs first.
Security properties
- Outbound-only: every connection is initiated from your side, so no inbound firewall rules are required and no static Mintive IPs need to be allowlisted
- Encrypted and authenticated: the tunnel is TLS end-to-end, and each tunnel is authenticated by its own shared secret
- Network policy as the trust boundary: access to internal services is governed by your network policy, not by URLs configured in Mintive
- Rotation without downtime: shared secrets can be rotated without dropping the tunnel
- Audit trail: every request and response through the tunnel is logged (metadata always; content only if content logging is on, see Zero data retention) with the same identity and policy context as any other Mintive request
Related
- Add a remote MCP: Connect to SaaS or publicly-reachable MCP endpoints
- Add a hosted connector: Run an MCP server inside Mintive's infrastructure
- Authentication models: How Mintive handles credentials end-to-end
Provision tunnels from Enterprise settings under the Private network tab. Provisioning shows the tunnel proxy URL and generates the reverse proxy shared secret, which is only shown during provisioning or replacement, so store it in your secret manager before closing the dialog.